Media Management Guide
Comprehensive guide to uploading, organizing, and managing media content including images, videos, presentations, and creating various app types.
Table of Contents
Introduction to Media
Media is any content you want to display on your screens. This includes:
- 📷 Images - Photos, graphics, logos (JPG, PNG, GIF)
- 🎥 Videos - Promotional videos, announcements (MP4, AVI)
- 📊 Presentations - PowerPoint slides (PPT, PPTX)
- 🎯 Apps - Interactive content (weather, clocks, YouTube, etc.)
- 📋 Playlists - Collections of media items that play in sequence
All your media is stored in the Media Library, where you can organize, edit, and manage it.
Accessing the Media Library
Opening the Media Library
- After logging in, look at the main navigation menu
- Click on "Media"
- The media library will open, showing all your content
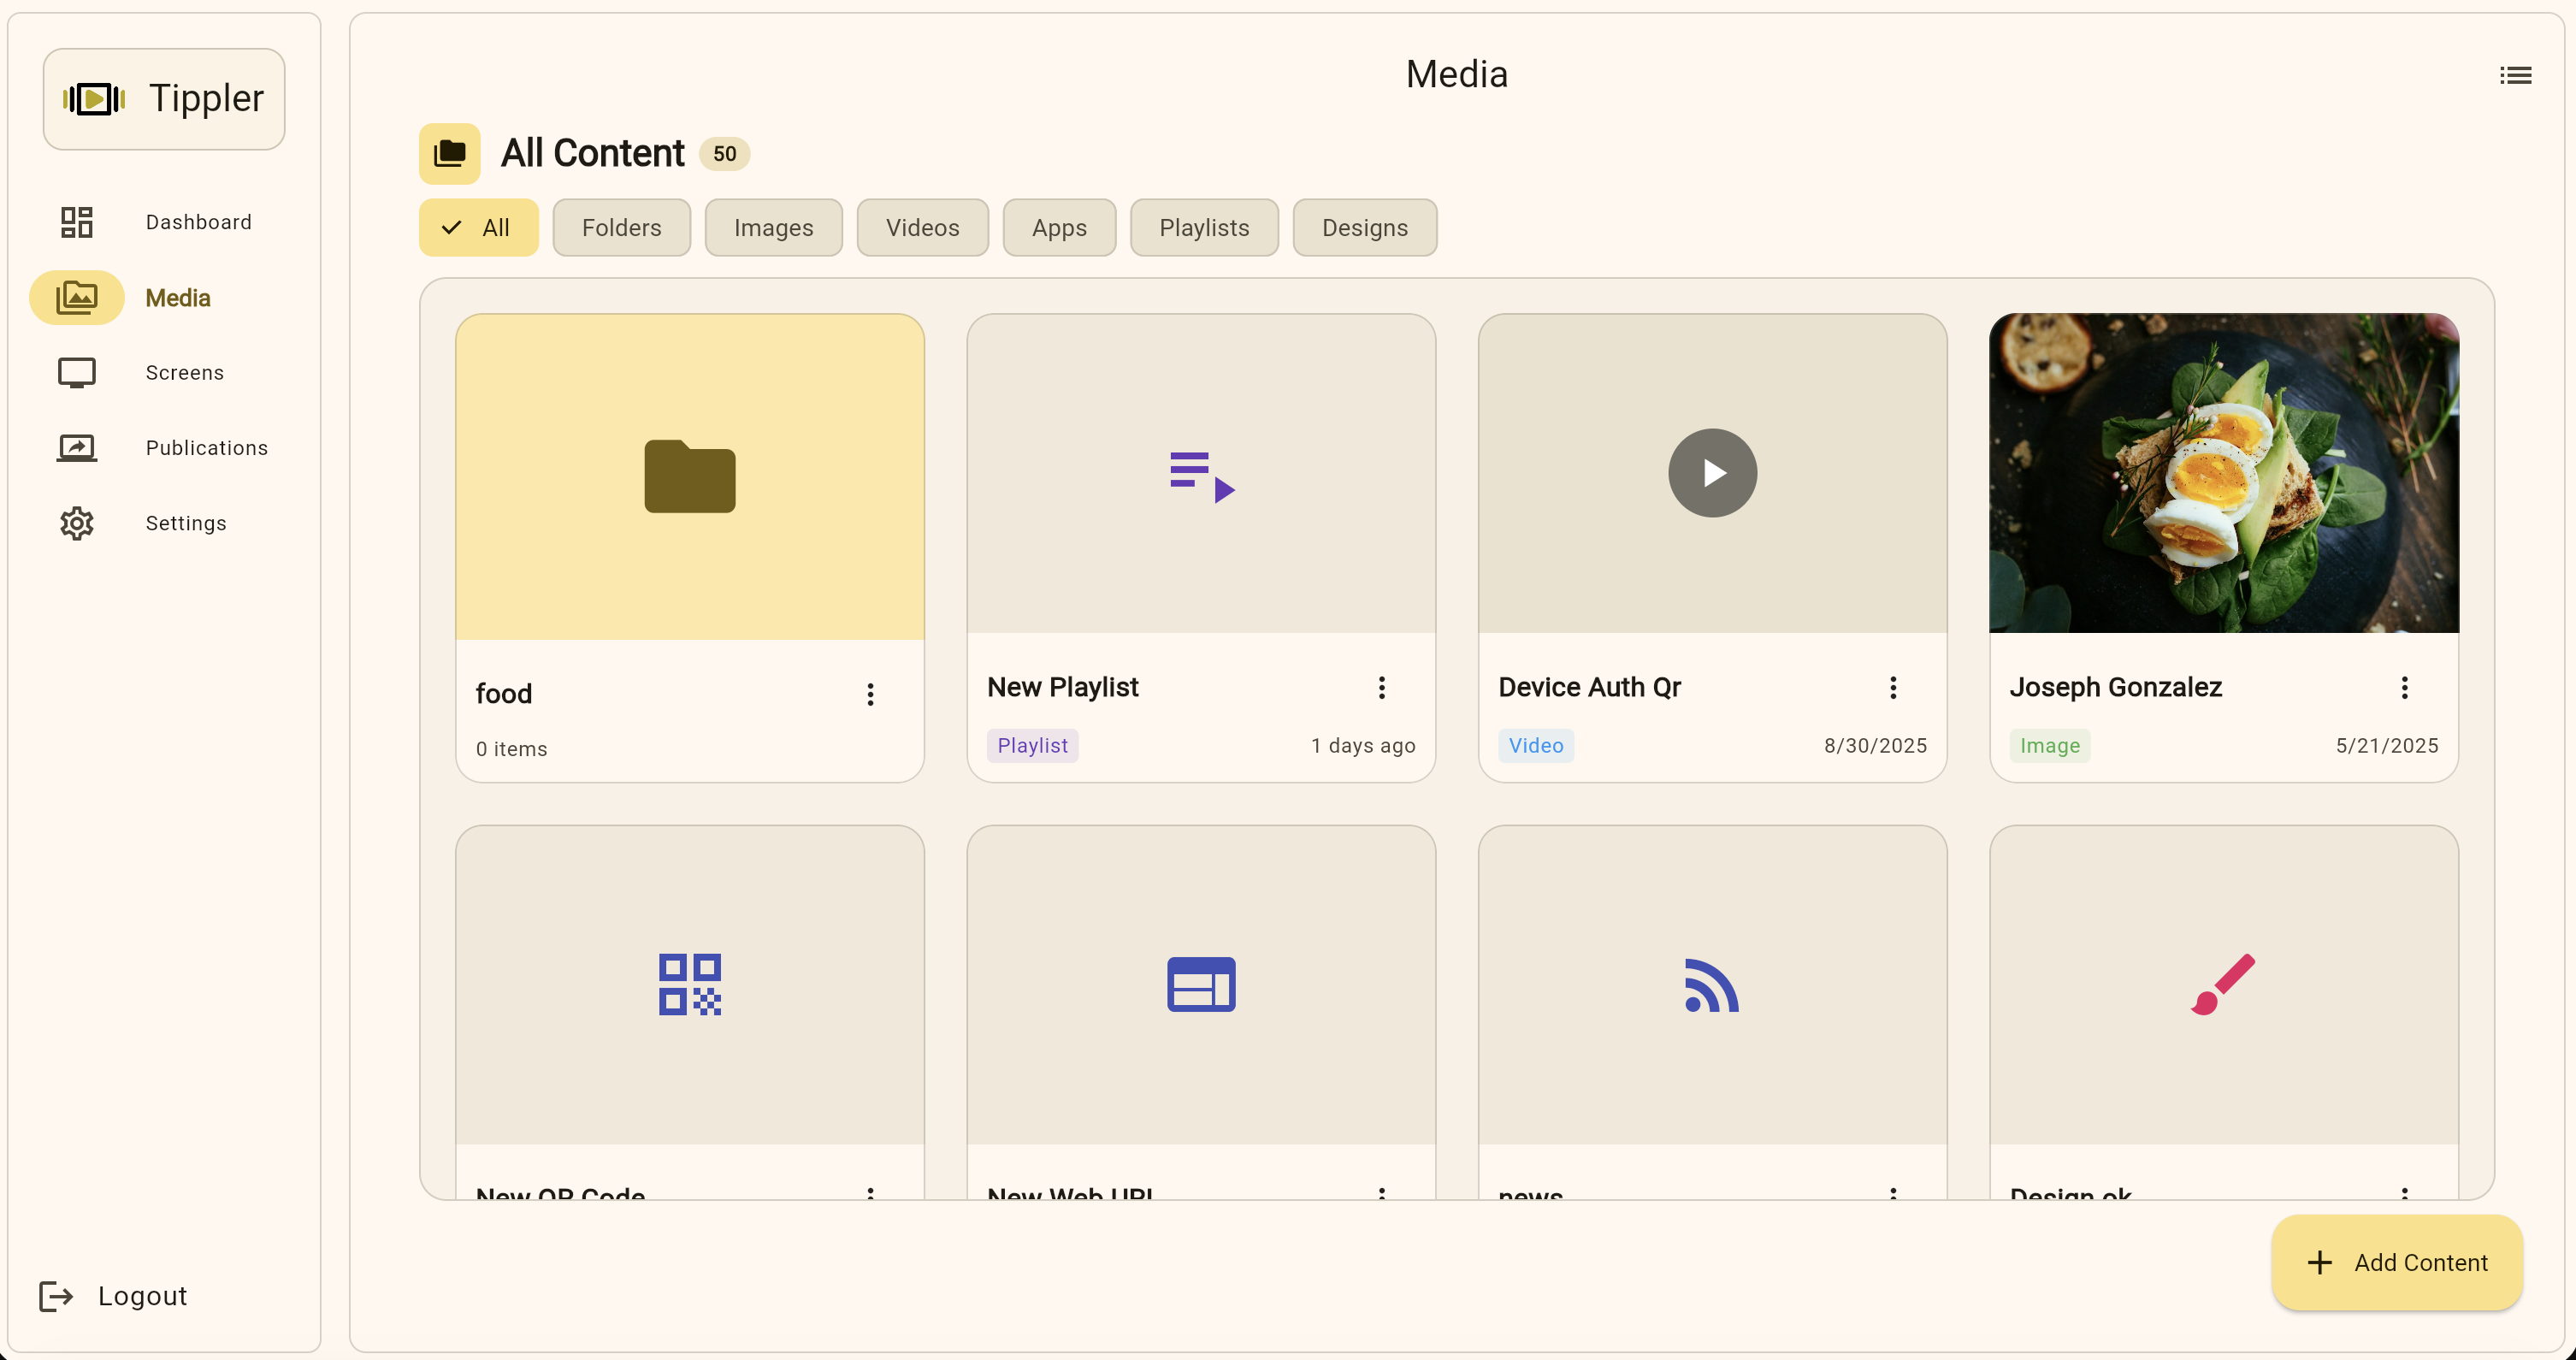
Understanding the Media Library View
The media library typically shows:
- Thumbnail previews of your media items
- Media names below each item
- Media type icons (image, video, app, etc.)
- Action buttons (edit, delete, preview)
- Filter and search options at the top
- Upload/Create buttons for adding new content
Uploading Media Files
Uploading Images
Images are perfect for displaying photos, graphics, announcements, and promotional content.
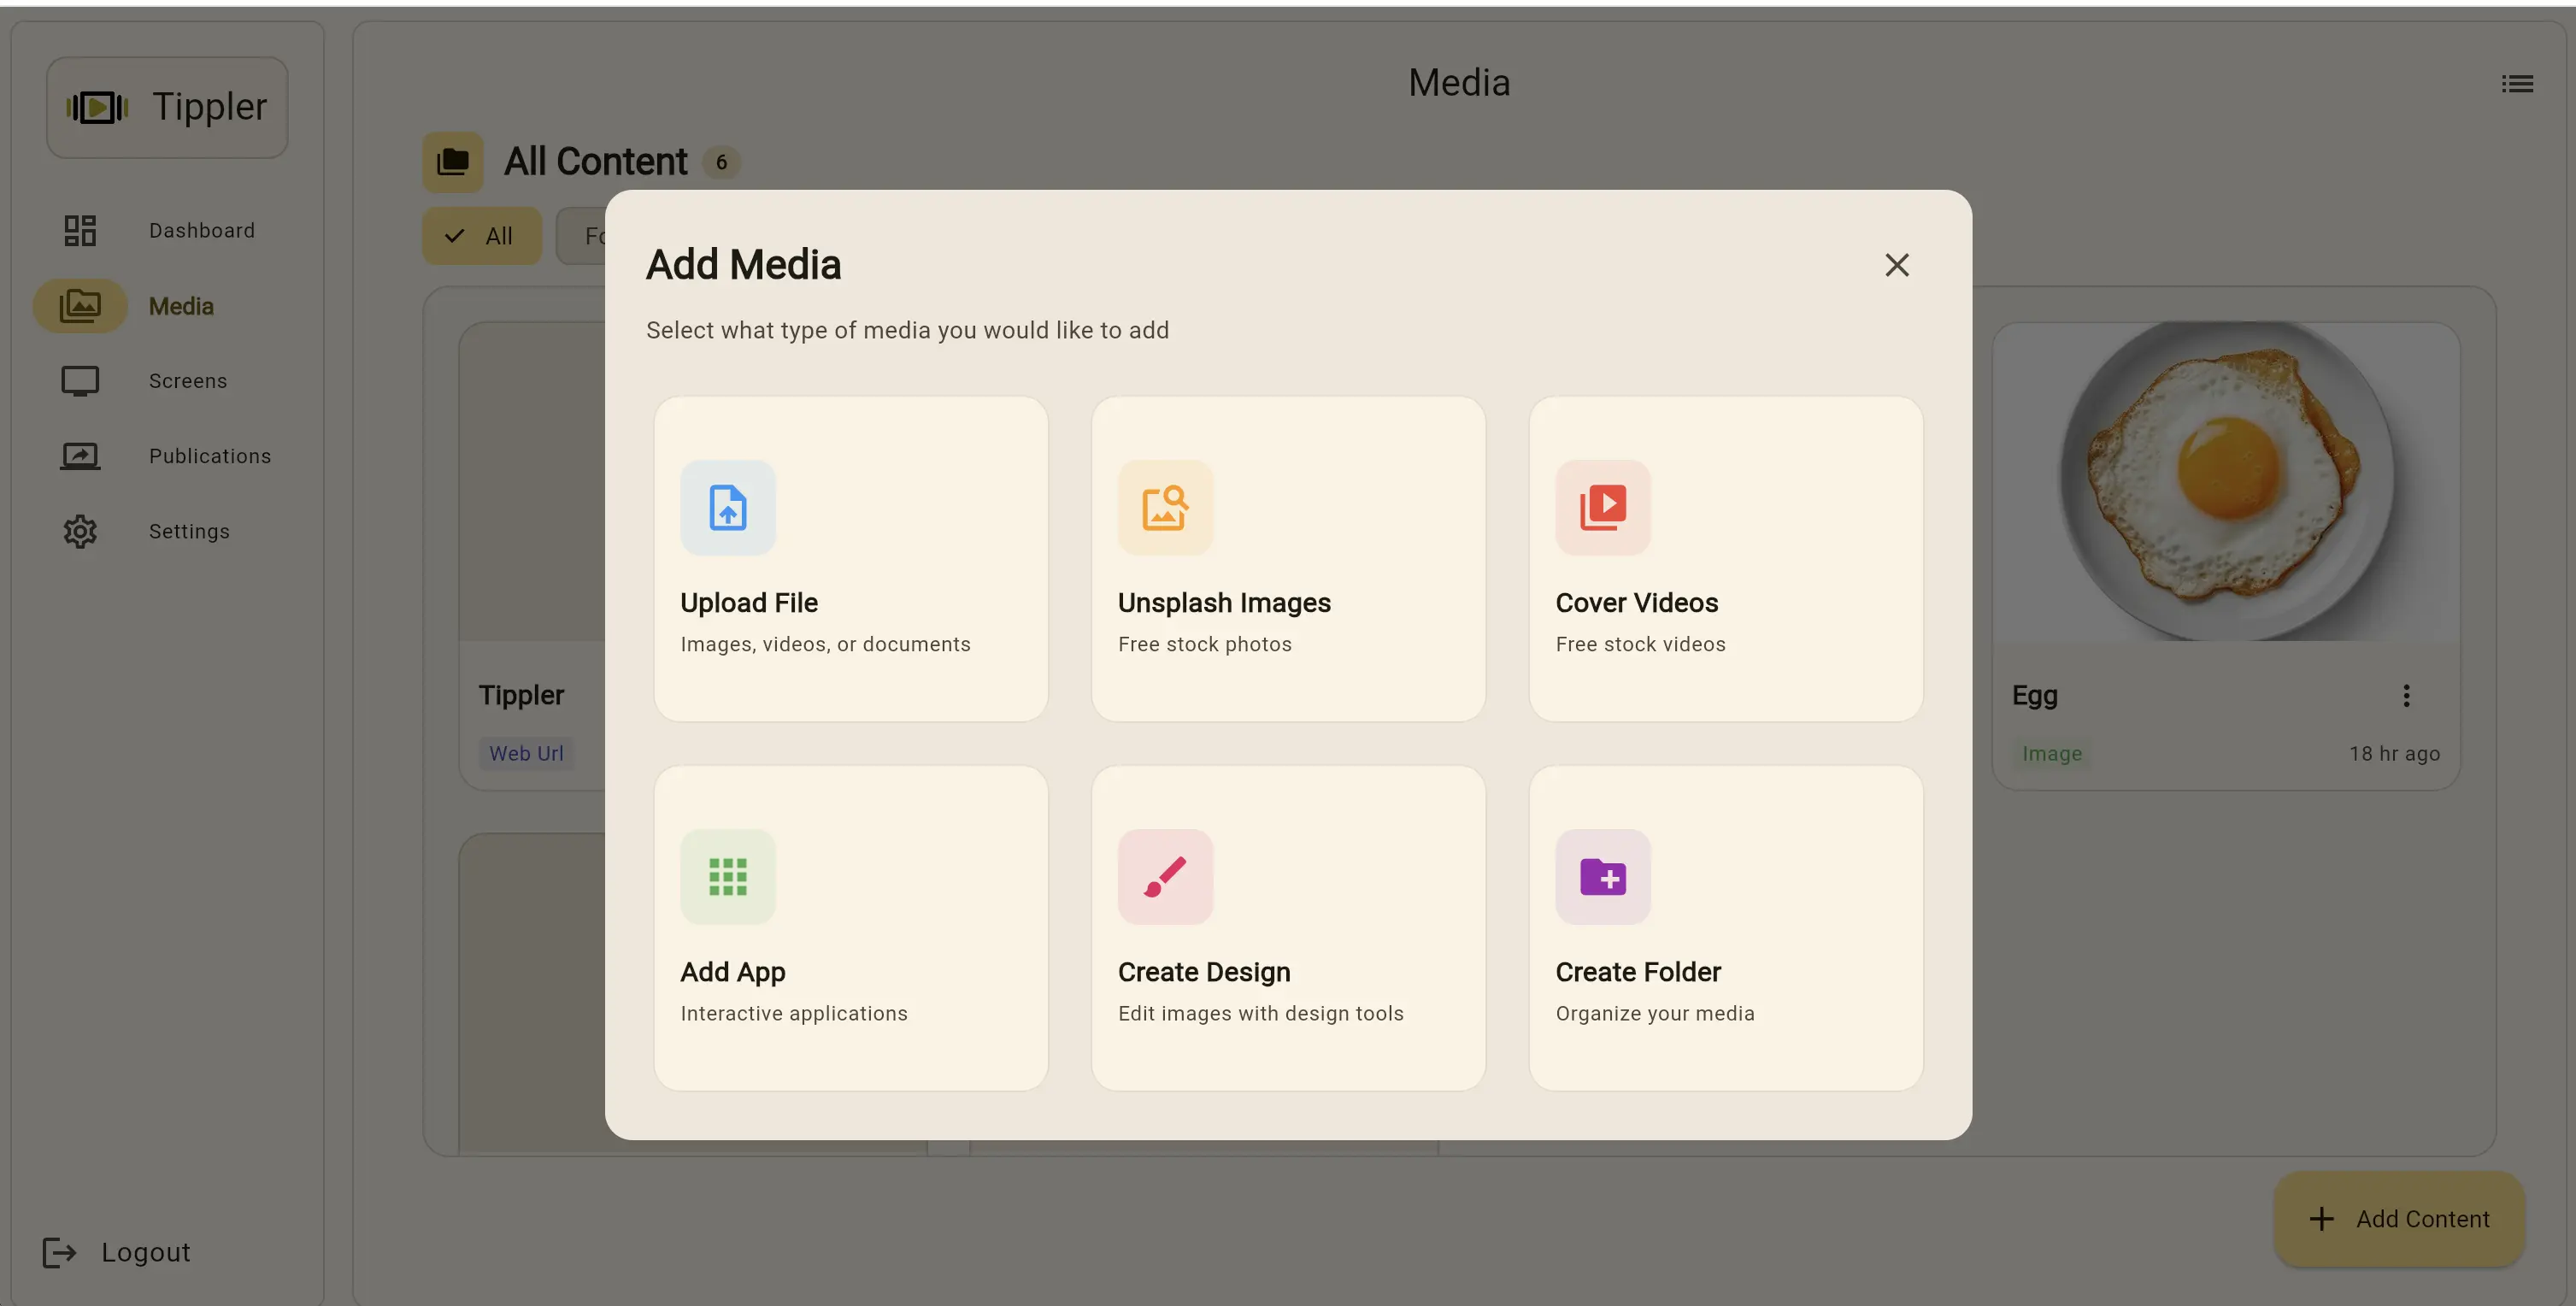
Step 1: Start Upload Process
- In the Media Library, click the "Add Content", button
- Select "Upload File" option
- A file browser window will open
Step 2: Select Your Image
- Navigate to the image file on your computer
- Select the image file (JPG, PNG, or GIF format)
- Click "Open" or "Choose"
Step 3: Configure Upload
- Enter a descriptive name for your image
- Use names that help you identify the content later
- Example: "Summer Sale Promo" instead of "IMG_1234"
- Optionally select a folder to organize the image
- Review the preview if available
Step 4: Complete Upload
- Click "Save", "Upload", or "Done"
- Wait for the upload to complete
- You'll see a progress indicator
- A success message will appear when done
- Your image now appears in the media library
Supported Image Formats:
- JPG/JPEG - Best for photos
- PNG - Best for graphics with transparency
- GIF - For simple animations
Recommended Image Specifications:
- Resolution: Match your screen resolution (typically 1920x1080 or higher)
- File size: Keep under 10MB for best performance
- Aspect ratio: Match your display screen dimensions
Uploading Videos
Videos are great for engaging content, tutorials, advertisements, and announcements.
Step 1: Start Upload Process
- Click the "Add Content" button
- Select "Upload File" or "Upload Video"
Step 2: Select Your Video
- Navigate to your video file
- Select the video (MP4, AVI, or other supported formats)
- Click "Open"
Step 3: Configure Upload
- Enter a descriptive name for your video
- Optionally add a description or tags
- Select a folder if using organization
- Review the video details (duration, size)
Step 4: Monitor Upload Progress
- Click "Upload" to start
- Important: Video uploads may take several minutes depending on:
- File size
- Internet connection speed
- Server processing time
- Watch the progress bar
- Do not close the browser or navigate away during upload
Step 5: Processing Complete
- Wait for processing to complete
- A success message will appear
- Your video is now ready to use
Supported Video Formats:
- MP4 - Most compatible, recommended
- AVI - Widely supported
- Check with your administrator for other formats
Video Best Practices:
- Resolution: 1920x1080 (Full HD) recommended
- File size: Compress videos to reduce file size
- Duration: Keep under 2 minutes for better engagement
- Format: Use MP4 (H.264) for best compatibility
Creating App Content
Apps are interactive content types that display dynamic or live information. The platform offers multiple app types.
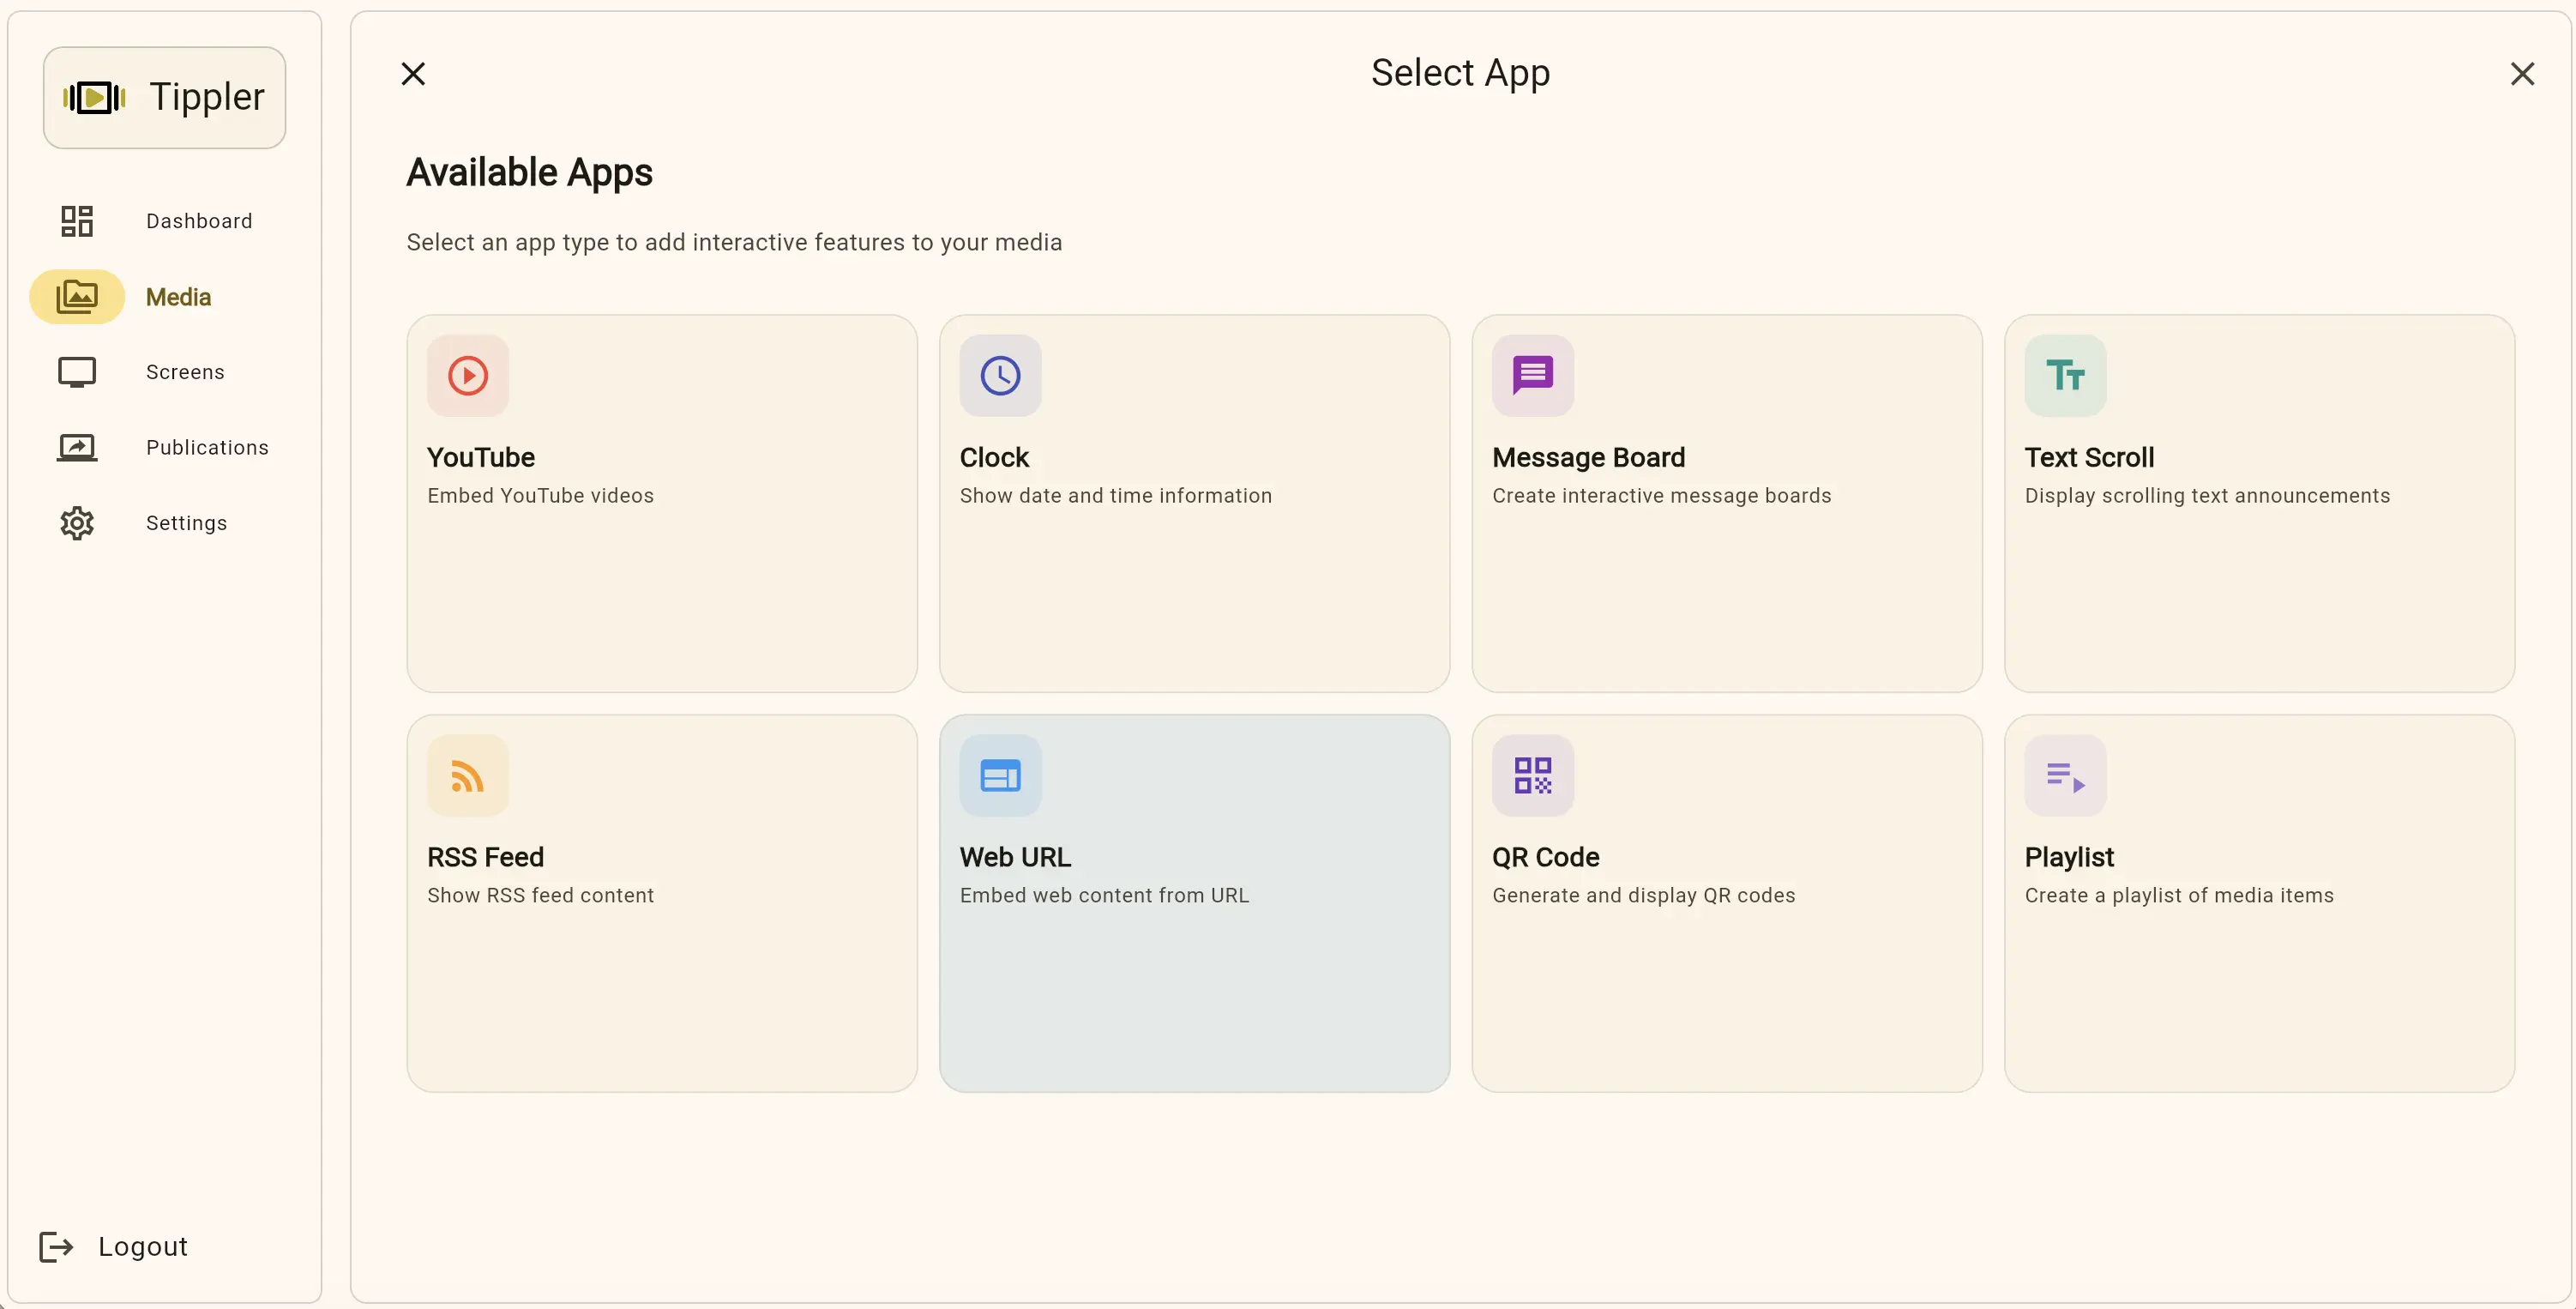
Accessing the App Creator
- In the Media Library, click "Create App", "Add App"
- An app selection screen will appear showing all available app types
- Browse the available options
YouTube App
Display YouTube videos on your screens.
When to Use
- Promotional videos from your YouTube channel
- Educational or training content
- Entertainment in waiting areas
- Product demonstrations
Creating a YouTube App
Step 1: Select App Type
- Click "YouTube" from the app options
- The YouTube app configuration form opens
Step 2: Enter Video Information
- Name: Enter a descriptive name (e.g., "Product Demo Video")
- Video URL or ID:
- Paste the full YouTube URL:
https://www.youtube.com/watch?v=VIDEO_ID - Or just the video ID:
VIDEO_ID
- Paste the full YouTube URL:
Step 3: Configure Playback
- Autoplay: Choose whether video starts automatically
- Loop: Choose whether video repeats when finished
- Volume: Set default volume level
- Show Controls: Choose whether to display player controls
Step 4: Save
- Click "Save" or "Create"
- Your YouTube app is now in your media library
- You can use it in any publication
Clock App
Display current date and time information.
When to Use
- Always-on time display
- Meeting rooms
- Reception areas
- Any location needing time reference
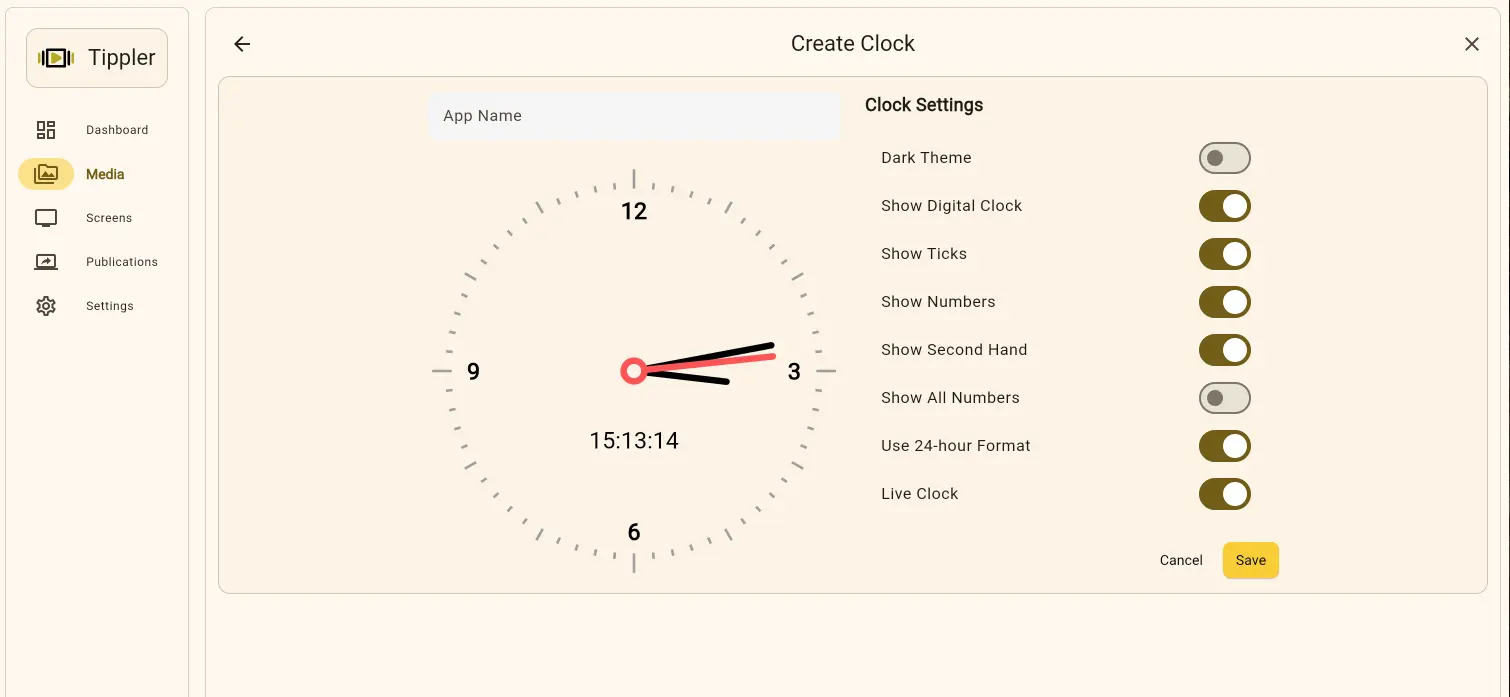
Creating a Clock App
Step 1: Select App Type
- Click "Clock" from the app options
Step 2: Time Format
- Name: Enter a name (e.g., "Lobby Clock")
- Time Format: Choose 12-hour or 24-hour format
- Show Seconds: Toggle seconds display on/off
Step 3: Style Options
- Clock Style: Choose analog or digital
- Font Size: Select size for visibility
- Color Scheme: Pick colors for time and date
- Background: Select background color or style
Step 4: Save
- Click "Save"
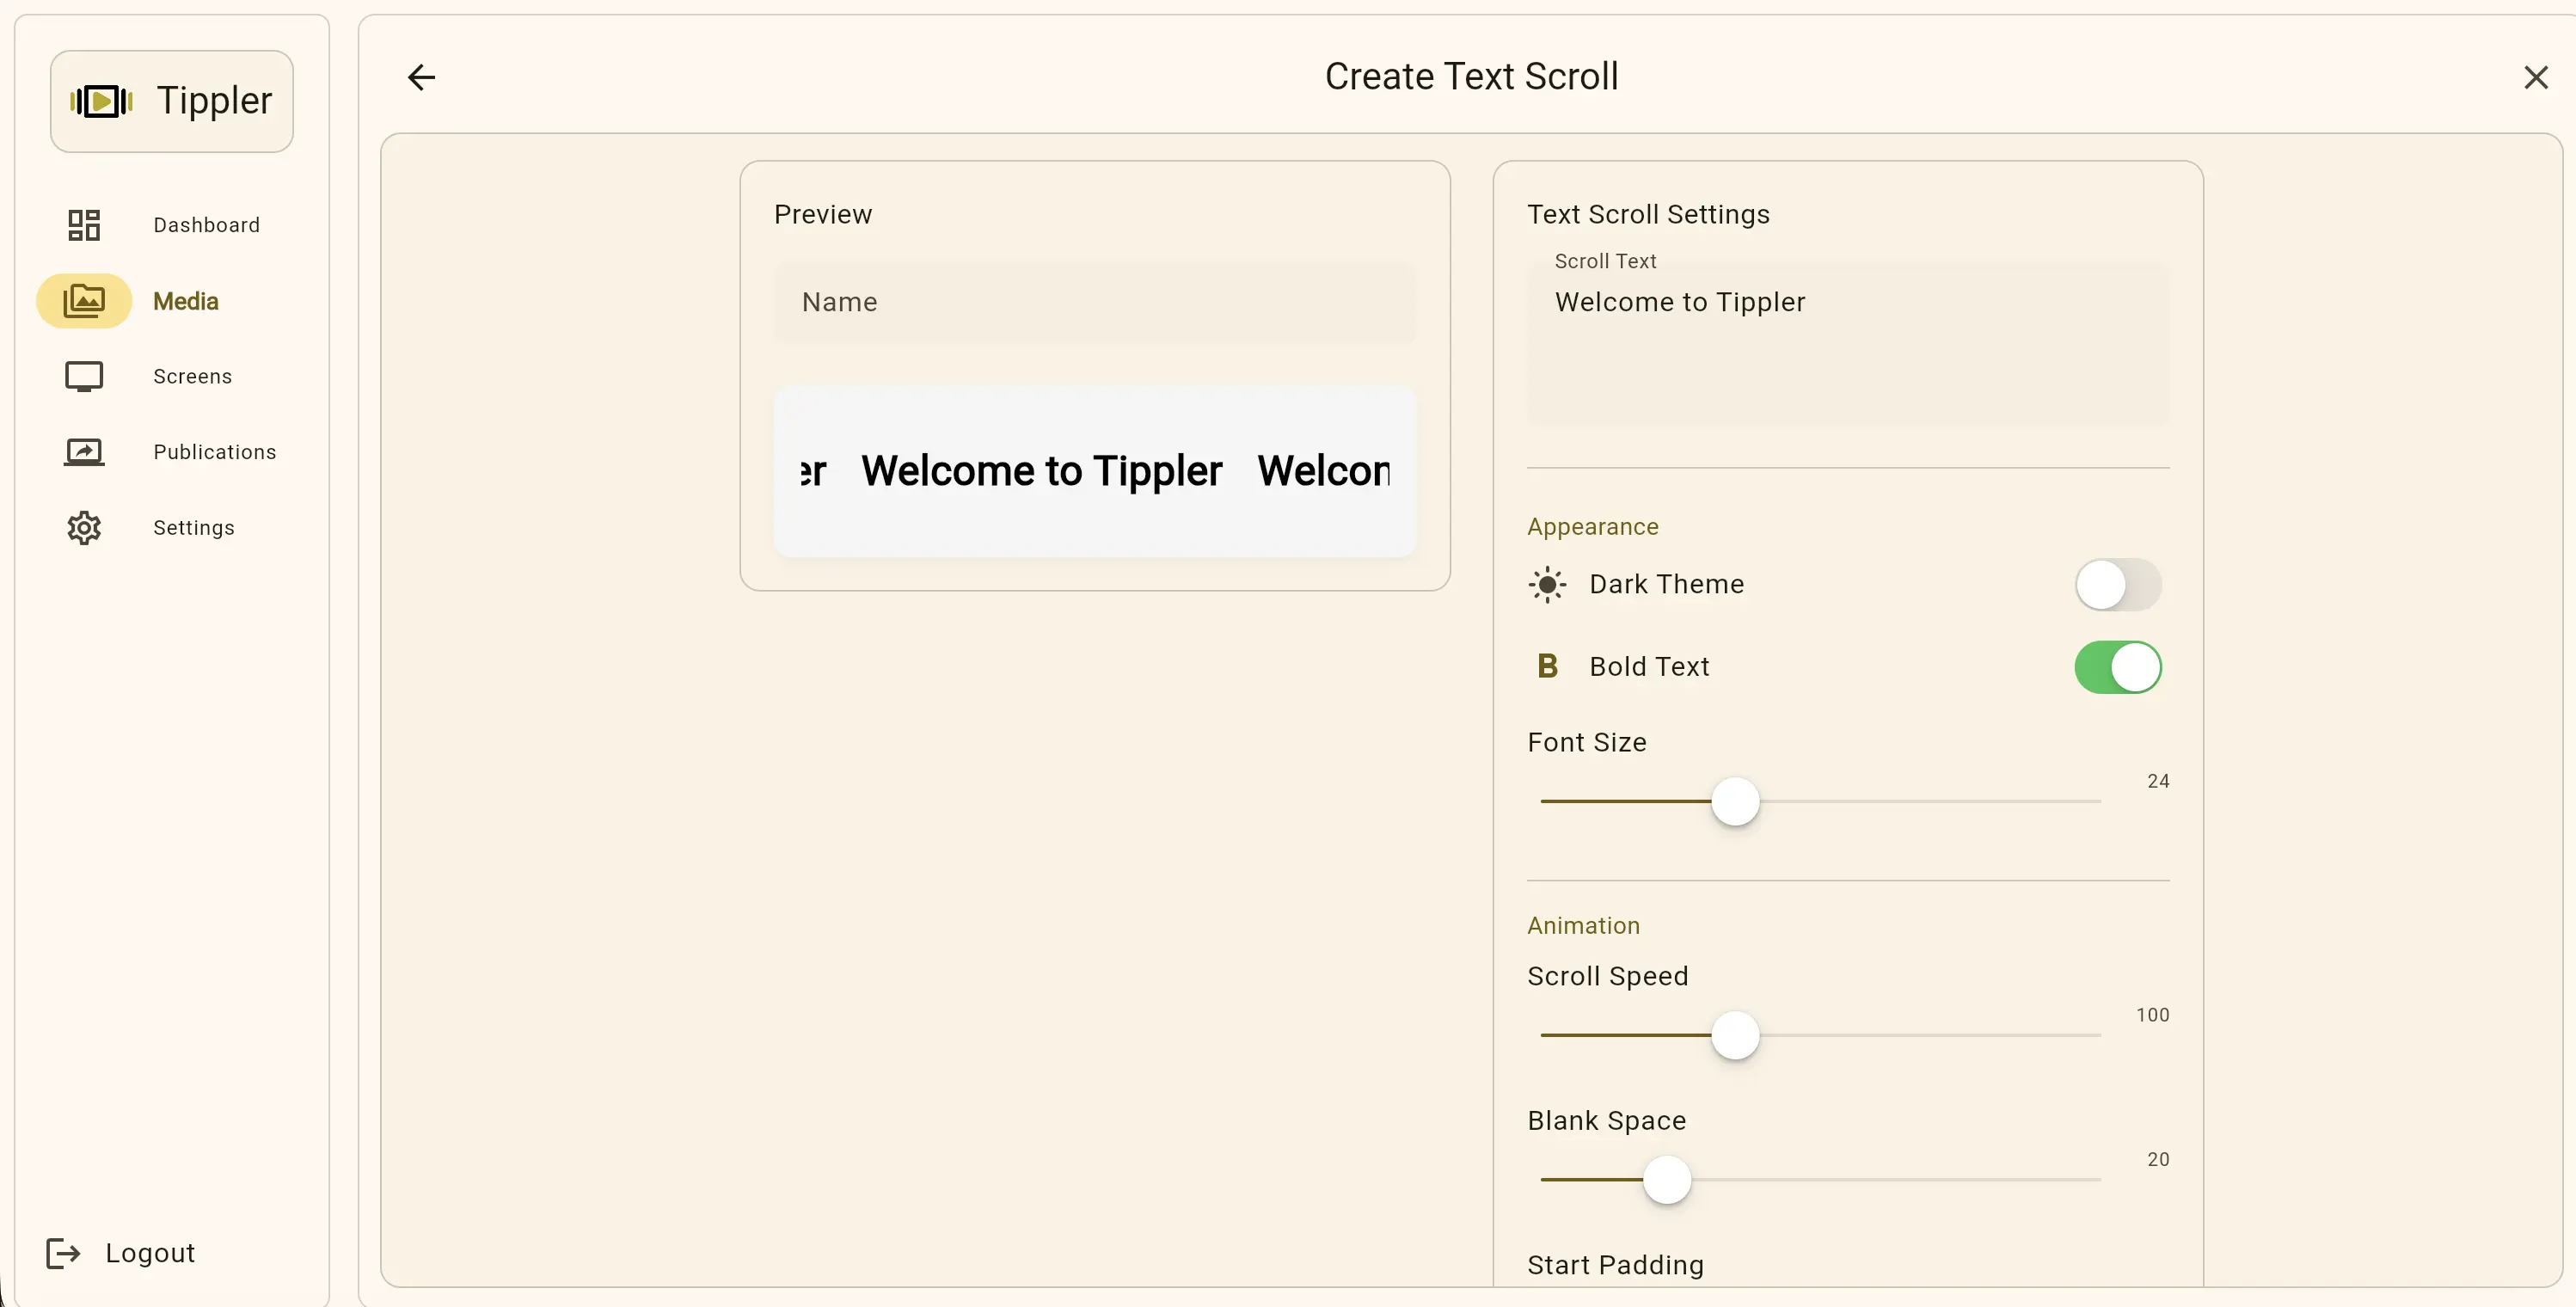
Text Scroll App
Display scrolling text banners (similar to news tickers).
When to Use
- Breaking news
- Continuous announcements
- Stock tickers
- Bottom-screen information banners
Creating a Text Scroll App
Step 1: Select App Type
- Click "Text Scroll" from the app options
Step 2: Content
- Name: Enter a name (e.g., "News Ticker")
- Text Content: Enter the text to scroll
- Can be longer than message board text
- Separate multiple items with separators
Step 3: Scroll Settings
- Direction: Horizontal (left/right) or Vertical (up/down)
- Speed: Adjust scroll speed
- Loop: Choose if text should repeat continuously
Step 4: Styling
- Text Size: Choose appropriate size
- Text Color: Select color
- Background: Choose background color or transparency
Step 5: Save
- Click "Save"
RSS Feed App
Display live content from RSS feeds (news, blogs, etc.).
When to Use
- News displays
- Blog updates
- Industry news
- Company announcements feed
Creating an RSS Feed App
Step 1: Select App Type
- Click "RSS" or "RSS Feed" from the app options
Step 2: Feed Information
- Name: Enter a name (e.g., "Tech News Feed")
- RSS Feed URL: Paste the RSS feed URL
- Example:
https://example.com/feed.xml - Get this from the website you want to display
- Example:
Step 3: Display Options
- Items to Show: Number of articles to display (e.g., 5, 10)
- Display Mode: Headlines only, full articles, or summary
- Update Interval: How often to refresh (e.g., every 15 minutes)
Step 4: Styling
- Layout: List, grid, or carousel
- Font Size: Choose size
- Colors: Set text and background colors
Step 5: Save
- Click "Save"
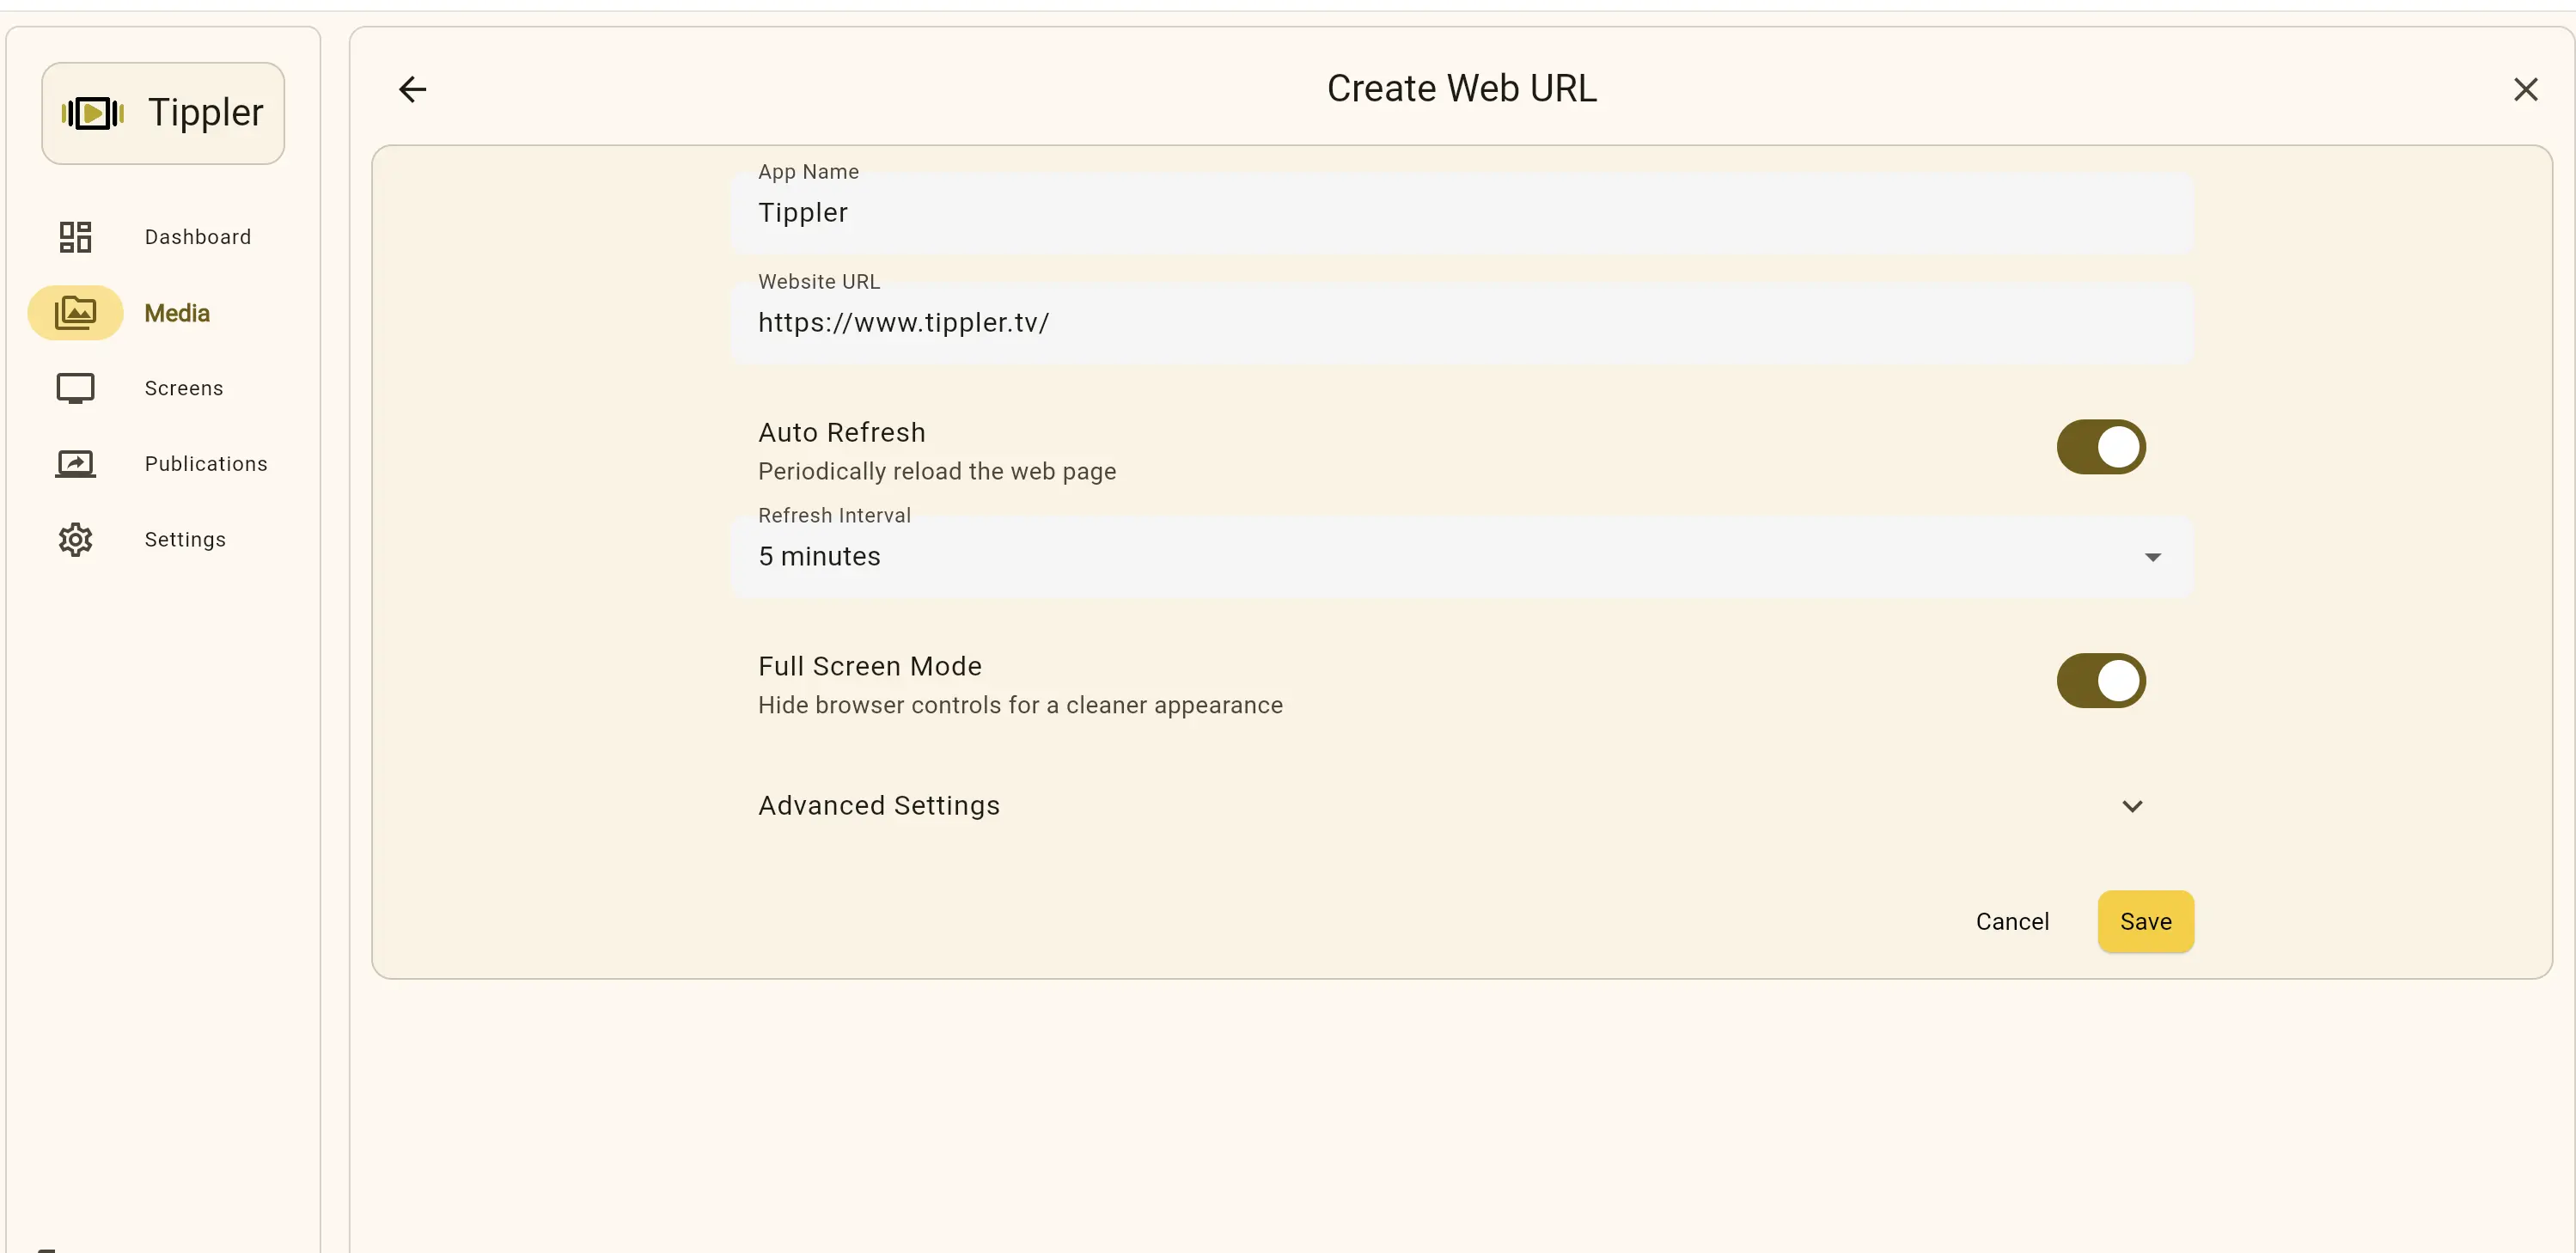
Web URL App
Embed any website as content on your displays.
When to Use
- Company intranet pages
- Web dashboards
- Online forms or surveys
- Web applications
Creating a Web URL App
Step 1: Select App Type
- Click "Web URL" or "Website" from the app options
Step 2: URL Configuration
- Name: Enter a name (e.g., "Company Dashboard")
- Website URL: Paste the complete URL
- Include
https://orhttp:// - Example:
https://example.com/dashboard
- Include
Step 3: Display Settings
- Refresh Interval: How often to reload the page
- Zoom Level: Adjust if content appears too small/large
- Allow Scrolling: Enable if content is longer than screen
Step 4: Save
- Click "Save"
Important Notes:
- Some websites may block embedding
- Test the URL in a browser first
- Check that the site is mobile-friendly
- Ensure the site loads quickly
QR Code App
Generate and display QR codes for easy scanning.
When to Use
- WiFi password sharing
- Website links
- Contact information
- Event registration
- Menu links
Creating a QR Code App
Step 1: Select App Type
- Click "QR Code" from the app options
Step 2: QR Code Data
- Name: Enter a name (e.g., "WiFi QR Code")
- Data/Content: Enter what the QR code should contain:
- Website URL
- Text message
- WiFi credentials
- Contact information
Step 3: Styling
- Size: Choose QR code size (small, medium, large)
- Color: Select QR code color (usually black)
- Background: Select background color (usually white)
Step 4: Additional Options
- Label: Add text label below QR code (e.g., "Scan for WiFi")
- Instructions: Add scanning instructions if needed
Step 5: Save
- Click "Save"
Playlist App
Create a playlist of multiple media items to play in sequence.
When to Use
- Rotating content display
- Mixed media presentations
- Scheduled content rotation
- Multiple advertisement rotation
Creating a Playlist App
Step 1: Select App Type
- Click "Playlist" from the app options
Step 2: Playlist Name
- Name: Enter a descriptive name (e.g., "Morning Announcements Playlist")
Step 3: Add Media Items
- Click "Add Media" or "Select Media"
- The media picker will open
- Browse your media library
- Click on media items to add them to the playlist
- You can select multiple items
- Click "Done" or "Add" when finished
Step 4: Arrange Order
- Your selected media items appear in a list
- Drag and drop items to rearrange the order
- Items will play in the order shown (top to bottom)
Step 5: Set Duration
- For each item, set how long it should display
- Default durations:
- Images: 10-15 seconds
- Videos: Full duration
- Apps: Custom duration
- Adjust as needed for your content
Step 6: Playlist Settings
- Loop Playlist: Choose if playlist should repeat continuously
- Transition: Select transition effect between items
- Total Duration: Review total playlist length
Step 7: Save
- Click "Save"
Playlist Tips:
- Mix content types for variety
- Keep total duration reasonable (5-15 minutes)
- Order items strategically for flow
- Test the playlist before deploying
More Apps comming soon ..!
Last Updated: [Date] Version: 1.0